Background
All Provider Accounts in Profile EMR have the ability to add a digital signature to their account. This feature enables our Providers to be able to use their digital signature on certain forms we have built to auto populate their digital signature such as Forms and Requisitions.
Please note that Prescriptions cannot have electronic signatures added to them automatically. If you need to add your signature to a prescription, please click here for instructions on how to do this.
Digital Signature Size Requirements
Our recommended size requirements conforms with the signature box that appear on our Confidentiality Pledge.
Dimension of Signature Box from Confidentiality Pledge:
Height: 2.25 cm (0.89 inches)
Width: 7 cm (2.76 inches)
Standard Resolution: 320 x 100 Approximately plus/minus 10 px
Save the Signature into JPG format
1. The user will have followed the steps in this link and sent you their confidentiality form with the signature box signed.
2. Verify that Confidentiality pledge has been saved to the Account Management folder as per standard practices. If it has not been save, go to path below and save a copy of the pledge into this folder.
- \VCHFAS02.VCH.CA\regionaldata05$\PCCIS_DataShare\System Administration\Account Management\2. PCC EMR
3. Open the Confidentiality pledge PDF.
4. Click on the Windows Search icon.
5. Type in Snipping Tool in the search field.
6. Click on the Desktop Application Snipping Tool to begin.
7. The Snipping Tool application will appear. Click on the New button to begin.
8. Use your cursor to select the signature that lives within the signature box.
9. The selected area will now appear in the Snipping Tool Application. Click on the File, Save As.
10. The Save As window will appear. By Default, the save as type will be PNG. Modify this field to JPEG. Save signature file as .jpg with filename format as Signature_Lastname_Firstname_Userlogin in the same folder as the confidentiality form is saved.
Folder Path: \\vch.ca\departments\PCCIS_DataShare\System Administration\Account Management\2. PCC EMR
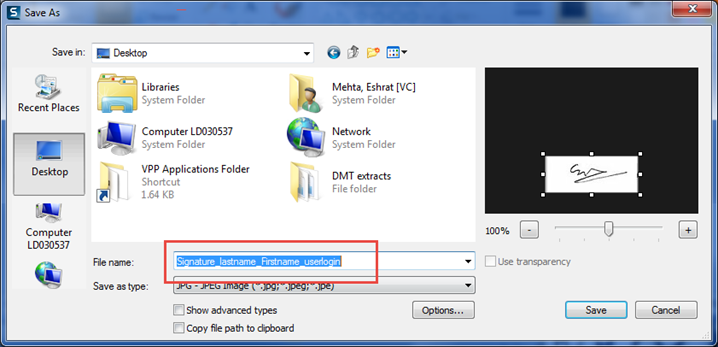
12. Go to the File Location that you save your signature image and open it up in the Paint Application. Confirm the jpeg image size meets our Standard Resolution: 320 x 100 Approximately plus/minus 10 px. Location circled in red below.
Modify the Resolution
1. If the resolution does not meet the standard, go to the File, Properties.
2. Image Properties window will appear. Modify the Width and Height to meet our standards. Then Click Ok button to save your changes.
Add Digital Signature in Profile EMR Provider Account
1. Launch EMR as admin user
2. Open Organization->People and Places
3. Look for the clinician and open up Clinician User Account.
4. Navigate to Special segment.
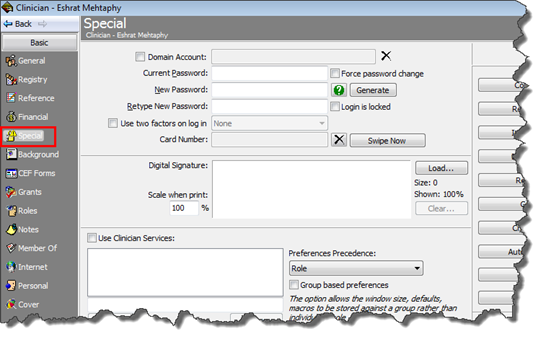
5. Click on Load
6 In the dialogue box, open the Files of type to All so you can view the saved jpeg file
7. Locate the signature saved in the Account Management folder under the name of the clinician. Hit Open button to upload signature into account.
8. Set Scale when print: 100%
Important Note: If Scale when print is not set to 100%, when Providers print a form with their digital signature on it. The pdf or printed form will display a big white box where their digital signature should display.
9. Click OK to save the changes