Steps to Mapping Termsets
1. Login to EMR Dev environment
2. Click on Health Records Collections under Maintain/Templates
3. Select Form to be mapped by double-click
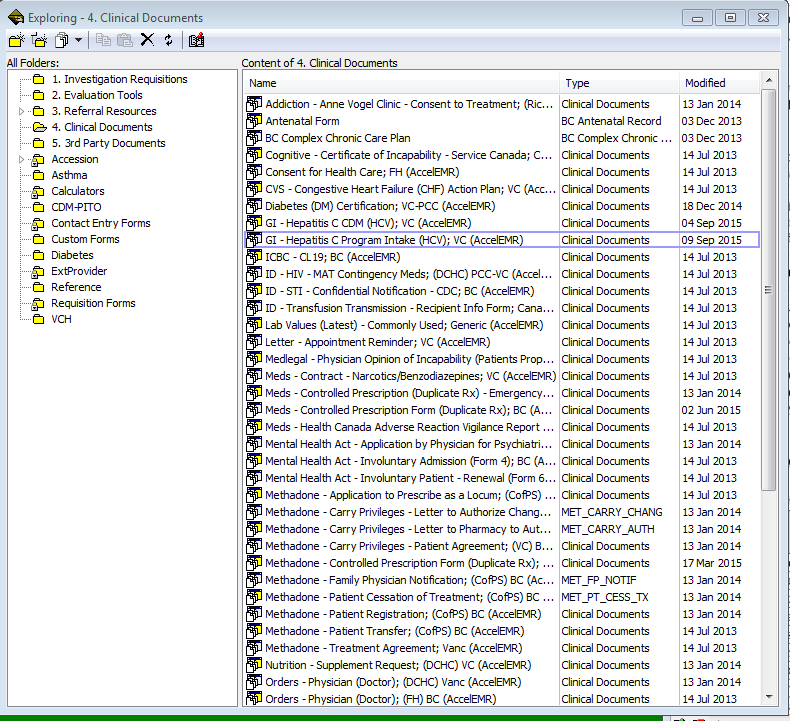
4. New window for the specific document opens
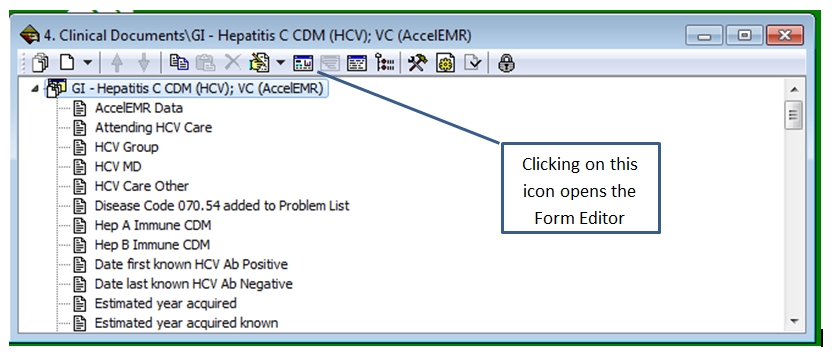
5. The editable Form and the Object Inspector opens
6. Under Maintain menu option, select Termset Maintenance to open the Concept window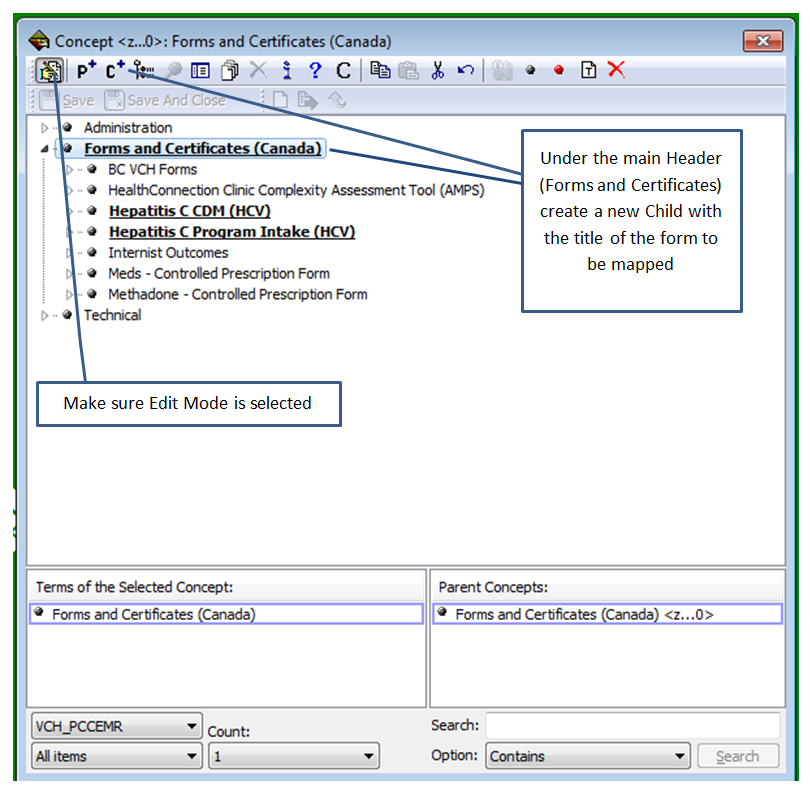
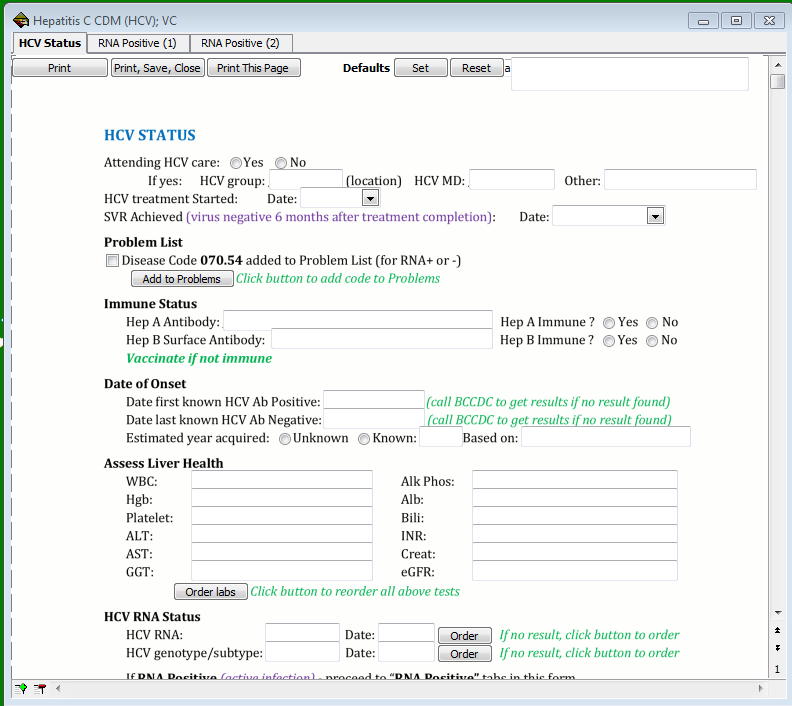
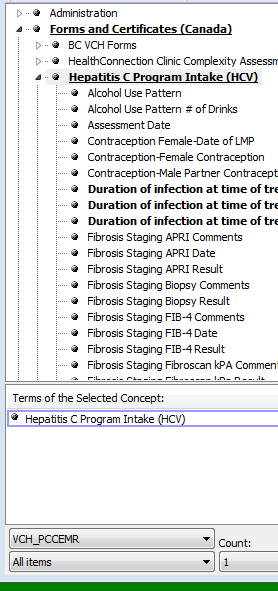
Once the pertinent Form has been added or selected, create Child for each data field. Most will be under the main heading. Some may be more logical to be placed under other fields (child to child).
Exceptions: no mapping is done for dropdown fields (eg some date fields), auto-populated fields (eg lab results), or auto-calculated fields (eg BMI).
Mapping Health Record Items:
After opening the above windows:
1. Create Child under Form in Concept window and Save – be as descriptive as needed but don’t worry overly much over duplicate names (see 4.)
2. Right-click in Clinical Document window – opens up options for New Item and choices for item type. Usual choices are: Text – 1 line of text (eg name of a drug); Multi text – longer text (eg details of patient history); Date/Time – for dates that are not drop-downs; Boolean – check boxes and radio buttons.
3. Select correct item type and type search term into search box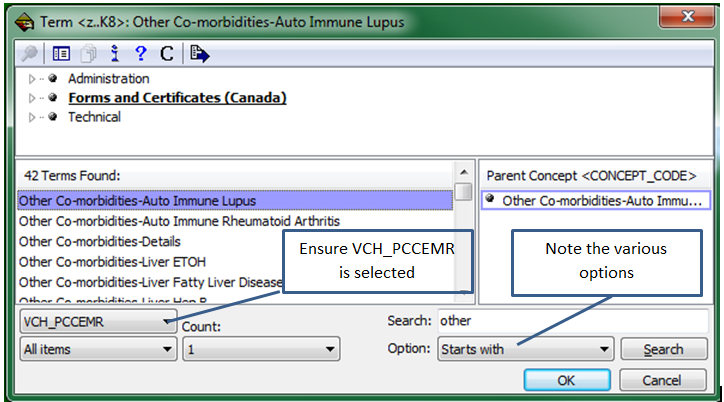
4. Select correct term and press OK. Note that search results display from all VCH_PCCEMR forms. Duplicate titles are not a problem but make sure the code displayed in the Parent Concept window is the same as in the Parent Concepts window of the Concept window. Might have to resize the windows to show the code.
5. A confirmation window pops up – make corrections to the concept name or press ok to accept.
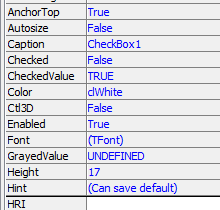
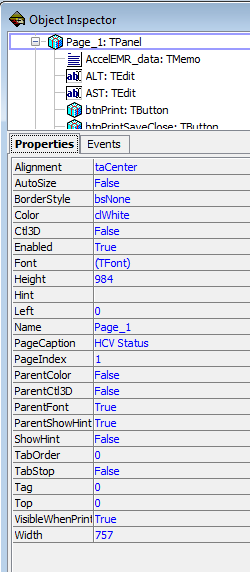
6. On editable Form, select the field for the term just entered. This populates the Object Inspector with the field properties. For text, multi-text and date, select the HRI option. A window with a list of all fields pops up, populated in chronological order from oldest to newest. Scroll to bottom of list, ensure it is the correct fields, and click OK.
For check boxes and radio buttons, also ensure the correct value is chosen (eg Yes/No).
The difference between check boxes and radio buttons: radio buttons are mutually exclusive, while check boxes allow multi selection. Radio buttons are entered by the programmer as a group which requires different mapping from check boxes.
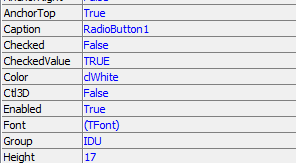
Radio buttons:
- Enter the term once
- Select the correct field; then, in the object inspector,
- Make sure the CheckedValue property shows what you want it to show. If a yes/no choice, then the CheckedValue for the NO button would be FALSE or NO.
- The Checked property is always False unless the radio button is pre-selected.
Check boxes:
- Each term has to be entered separately.
- As multiple selections are allowed, the CheckedValue for each term is TRUE or Yes.
- The Checked property is always False unless the check box is supposed to be pre-selected.