There are several ways of monitoring incidents. We have found that creating our own filters based on the application(s) and assignment group(s), is the most effective way of monitoring and resourcing incidents. Filters allow you to sort and view incidents based on your assignment group(s) and incident status.
Four common filters are: Assigned to me, Open Incidents, Unassigned Incidents, and Resolved Incidents. The following steps will help you add all four filters.
Assigned to me Filter
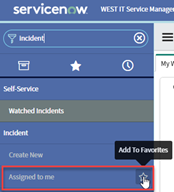
This filter is already created, just search for it in the Application Navigator pane and add it to your Favorites.
Open Incidents Filter
We are using the assignment group PARIS in this example, but you would choose whichever assignment group applies to you.
1. To create a new filter, click on Favorites then click on any filter, for example Incident-Assigned to me.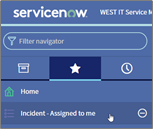
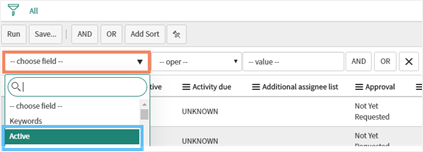
2. Click the  filter icon. Choose your conditions based on what you want to see. In this example we want to see open (active) incidents for a particular assignment group.
3. Select Active from the category.
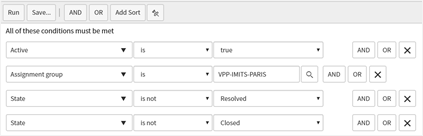
Change operators and values to meet your preference. Add more conditions to your filter by clicking: AND, OR.
- AND, allows you to add a condition that must also hold true for a row to appear.
- OR, adds a condition that can alternatively be true for a row to appear.

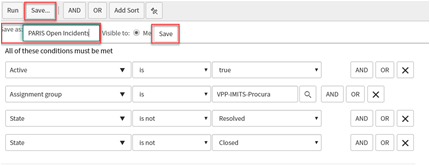
4. Complete the other 3 conditions to match the below example of an Open Incident filter.
5. Click Save.. (Save As)
a) Name your filter, for example: PARIS Open Incidents
b) Save
6. To create the other common filters for your assignment group(s), follow the above steps to add the applicable conditions shown in the examples below.
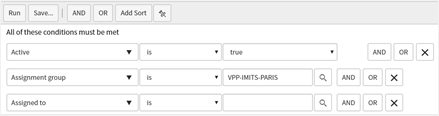
Unassigned Incidents filter
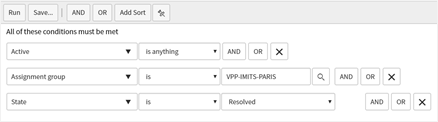
Resolved Incidents filter
7. Add filters to your Favorites list. See article Adding a Filter as a Favorite