Why Camtasia
Important Note about Moving Camtasia files
Create a course on the LearningHub
Recording Audio - Using Audacity or Camtasia
New Project
Navigation - The Media Bin
New Recording
Library and Templates
Edit the recording
Focus Your Screencast by Adding Annotations
Animations
Transitions
Reduce the size of mp4
Publishing for Storyline Module
Why Camtasia
Camtasia is great for elearning that needs to be developed quickly. It is good for video between 3 – 6 minutes
- Giving learners quick tips and information
- Giving existing learners quick updates
- Recordings without scripts
- Assets that will be used for a short period of time and will not need to be updated or edited
Important Note about Moving Camtasia files
If you do not move your files using this zip method, your Camtasia files will appear broken.
With Camtasia open,
- File > Export as zip
Create a course on the LearningHub
Create a course on the LearningHub so learners can find your eLearning. It takes a day or so, so this is the first step.
- Go to http://learninghubhelp.phsa.ca/contact
- Click New Course Request
Recording Audio - Using Audacity or Camtasia
Important: If you are planning to include audio, install Audacity https://www.audacityteam.org/download/
Record the audio first. Upload the audio file into the media bin and record the screen by following the audio.
Audio quality and editing features are more user friendly in Audacity. We can do a combined recording of audio and screen in Camtasia.
New Project
Important: Create a folder for your Camtasia project on the C drive (your desktop is NOT your C drive)
Save often, especially when working with a long video
Select New Project. You will be taken to the editor.
Timeline –The tracks that are at the top of the timeline are objects in front.
Important: Save the file to the C drive (your desktop is NOT your C drive)
Navigate to C Drive > Users > Yourname and work on the file from there
- Add a .1 to each new version and save to shared drive at the end of the day
- Remove your name from the original file – leave both versions (e.g. 1.0 and 1.1) in the shared drive folder.
Navigation - The Media Bin
Canvas, Timeline with playhead
Preferences menu, top toolbar with Record, tools and Share and
Middle toolbar with play, Properties for selected object
New Recording
Display Settings
Set your monitor to 1920 x 1080 if possible
The Media bin holds your recordings and images. If you want to add an image or video, add to the media bin first then drop into the work area canvas. The object will be inserted wherever the playhead is.
Important: Hide taskbar, make web browser full screen
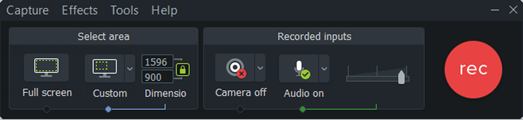
- Select New project > New Recording in the top left corner
- Set recording area – full screen
- Click REC
- Click Esc to Stop the recording
- The recording will appear in the media bin
- Important: Save the file to the C drive (your desktop is NOT your C drive)
Navigate to C Drive > Users > Yourname
Delete audio if there is no audio
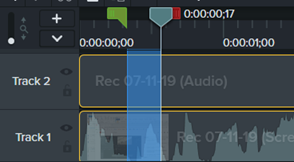
You will see the audio and video as 2 different tracks. If not, right-click the video track to Separate audio and video
Library and Templates
Add templates to the Library
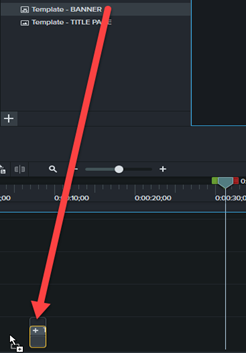
- Library > Find the template you would like to insert
- Drag and drop the template into the Track
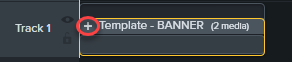
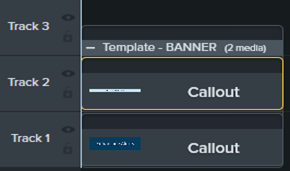
- If editing is needed, click the + sign to expand the contents
Create Templates
- Highlight the items on the Track you wish to save.
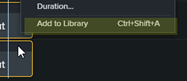
- Right click on highlighted > Add to Library (ctrl + shift + A)
- Name this template that has been added to your library
- Then right click on the template you have created > Export Selected Assets…
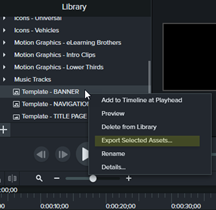
- Save the zip file to the shared folder:
\\VCHFAS02.VCH.CA\regionaldata05$\PCCIS_DataShare\00-Process&Templates\Templates-User Readiness\UR Templates - eLearning\2 Templates-Camtasia
- This way, others add the templates to their own Camtasia Library by drag and drop:
Edit the recording
Use Edit, Pan and Crop to move around the canvas

FAQ – I can’t find my file
If you have been working on the network and disconnect.
- Right click on the media in the media bin – Update media
- Move the files to a project folder on your C drive and work from there
Trim Start or End
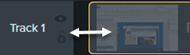
You can edit the start and end of the video by cutting out a segment of the track. Put your cursor over the start of the track and drag. Then pull the track to the beginning
If you trim too much pull the end out
Trim track
Edit as zoomed in as possible
Trim Middle
Select and drag playhead and move the green handle to the beginning. Use the scissors icon to cut that section out.
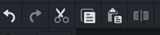
You can also use this toolbar at the top of the track area to cut or divide segments. The Cut tool (scissors) cuts out a segment of the video.
Split the video
The Split tool divides the segment in 2 at the frame that the play head is on
Double click the playhead to reset the selected area
Extend frame
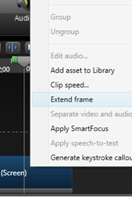
- Drag the playhead to the desired frame
- Right click on the track and select Extend frame.
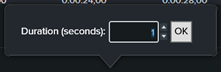
- A popup will ask for how long you want to extend it. If you want to edit the duration later, right click on the extended frame and select Duration.

Add Hotspots
In the track area, click Shift + M to add a marker so users can jump to sections
- Add hotspots to OK buttons or images on the screen
- Visual effects > Interactive Hotspot
- Click and drag to button or place on screen
- With the hotspot selected, check out the Properties
- Settings for Interactive Hotspot
- Select Pause at end
- Select Click to continue
Publish with Hotspots
- Click Share > Select Local File…
- Leave at Custom production settings
- Ensure dimensions are 1920 x 1080 or as set, next
- Next
- Produce with controllers
- Uncheck Auto-hid controls
- Uncheck Pause at start
Start thumbnail: Automatic - Select Stop with Replay button in the drop down menu
- Next, Next
- Set production name and location (to your C drive)
- Click finish
- Zip all files from publishing together
Add Markers and Menu buttons
In the track area, click Shift + M to add a marker so users can jump to sections
- Click the + in the timeline to add markers (or Shift + M)
- Right click Markers to rename
- Add buttons with Hotspots to create a Menu
Add Menu (using Markers)
- Share > Local File
- Next, Next
- Table of contents, do not Number marker entries
- Display Options > Fixed-left
- Marker – set to Text only
- Next
- Production Name
- Click Finish
Focus Your Screencast by Adding Annotations
You can add Callouts, Arrows, Shapes, Blur or Highlight, and Motion. Drag and drop annotations to the canvas and then change the timing
Add Callouts, Lines or Shapes

- Click Annotations
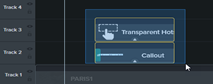
- Drag and drop Callout to the canvas
- The Callout will appear in the track – Use the track to set the timing of the Callout
- Right click > Show Properties to change the color and font of a Callout
|
Important note: You can select all text bubbles and change properties of all of them at once
|
|
|
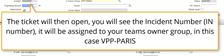
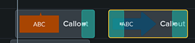
Information Callout
|
Use Style > Abstract, Speech Bubble 1 Fill Solid - FFFFFF Outline - EFA205 Thickness – 5 Opacity: 100% Font – Open Sans Regular Text: #000000 Size – 55 Align Center Default – Fade Transition 1 sec fade in, 0.18 fade out |
|
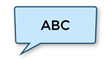
Action Callout
|
Use Style > Abstract, Speech Bubble 1 Fill: #C6E6FB, Outline: #164968 Thickness – 5 Opacity: 100% Font – Open Sans Regular Text: #000000 Size – 55 Align Center Default – Fade Transition 1 sec fade, 0.18 fade out |
|
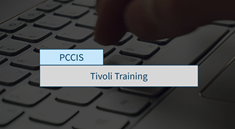
Title Page
|
HEADER: Fill: #C5E6FB Outline: #063C5D Thickness – 5 Opacity: 66%
TITLE: Fill: #D7D7D7 Outline: #063C5D Thickness – 5 Opacity: 66%
BOTH: Size – 79 Font – Source Sans Pro Regular Text: #063C5E Align Centre Default – Fade Transition 1 sec fade, 0.18 fade out
|
- Double click to edit text
- Reshape the Callout by dragging its corners
Shapes – Remove Drop Shadow
- Most shapes have a drop shadow
- In the properties, remove Drop Shadow if you are using a shape to cover something up
Spotlight

- Click Annotations and select the Blur & Highlight category
- Drag and drop Spotlight to the canvas and adjust size
- This will grey out the area outside of the spotlight

Pixelate or Blur
- Click Annotations and select the Blur & Highlight category
- Drag and drop the Blur or Pixelate to the canvas and adjust size

Highlight

- Click Annotations and select the Blur & Highlight category
- Drag and drop the Highlight to the canvas and adjust size

Interactive Hotspot

- Click Annotations and select the Blur & Highlight category
- Drag and drop the Interactive Hotspot to the canvas and adjust size

Animations
Click the Animations tab
The Properties will appear at the right of the canvas
Zoom-n- Pan
Another way to zoom a specific area is to Copy that area and crop
Transitions

Fade in and out
- Select the type as Fades
- On the timeline, select the annotations you want to fade.
- Drag the Fade onto the timeline.
- Releasing your mouse in the middle of the annotation will result in both a fade in and fade out transition. If you want to add just fade in or fade out, release the mouse while hovering on one end.
- Adjust the length of the transition by clicking the edge of the Fade and dragging it.
- To delete the Fade, right click on it and Delete.
Review Footage
Drag the playhead or use the Play button below the canvas
Slow down video
When you slow down videos, you can work with the MP4
- Open Camtasia
- Select New Project
- Drag into the Media Bin
- Drag to the timeline
- Right click video in the Timeline
- Select Add Clip Speed
- Properties panel > Clip Speed section >
- To slow down = 90% > set to 0.9
- Now follow the Publish steps below
Add Markers and Menus
In the track area, click Shift + M to add a marker
- Click the + to add markers
- Right click Markers to rename
- Share > Local File
- Next, Next
- Table of contents, do not Number marker entries
- Display Options > Fixed-left
- Marker – set to Text only
- Next
- Production Name
- Click Finish
Reduce the size of mp4
If the file is too big, you can reduce the size of mp4 by separating and removing audio track when there is no audio.
- Open a project
- Add video to media bin
- Drag to Track 1
- Align at 0:00
- Right-click Separate audio and video
- Select and Delete audio in Track 2 – if audio is not needed
- Click Share (top right) >Local File

- Next
- Next
- Deselect Produce with controller
- Next
- Next
- Rename
- Folder is automatically created
- Finish
- Delete Track 1 and file in Media Bin
Publishing for Storyline Module
- Click Share > Select Local File…
- Leave at Custom production settings
- Ensure dimensions are 1920 x 1080 or as set
- Click Next
- Select MP4
- Turn off Produce with Controller
- Click Next, Next
- Set Name and Location
- Click Finish
Publish with Replay button for LearningHub
- Publish to MP4
- Share Local File
- MP4
- Produce with Controller
- Uncheck Auto-hide controls
- After video: Stop with Replay button
Upload to LearningHub
- Upload as a file resource
- Unzip
- Click File player.html
- Click Set Main File
- Appearance > Uncheck Display resource description
- Appearance > Display > Select In pop-up
- Appearance > Show more > Width: 900 Height: 600 (in pixels)
- Activity Completion > Select Show activity as complete when conditions are met
- Select Student must view the activity to complete it
- Save and return to course
* If there was a previous version, delete the old version and replace it with your current upload.